Zastone KT-8900 Mini Dual Band Transceiver: Difference between revisions
| Line 54: | Line 54: | ||
Some quick positives: It is very small, it seems pretty tough, and it is inexpensive. I use them as backup radios to quickly place in a vehicle while the main radio is being serviced. For the size they push pretty good transmit power and the microphone audio is loud. | Some quick positives: It is very small, it seems pretty tough, and it is inexpensive. I use them as backup radios to quickly place in a vehicle while the main radio is being serviced. For the size they push pretty good transmit power and the microphone audio is loud. | ||
== | ==basic usage== | ||
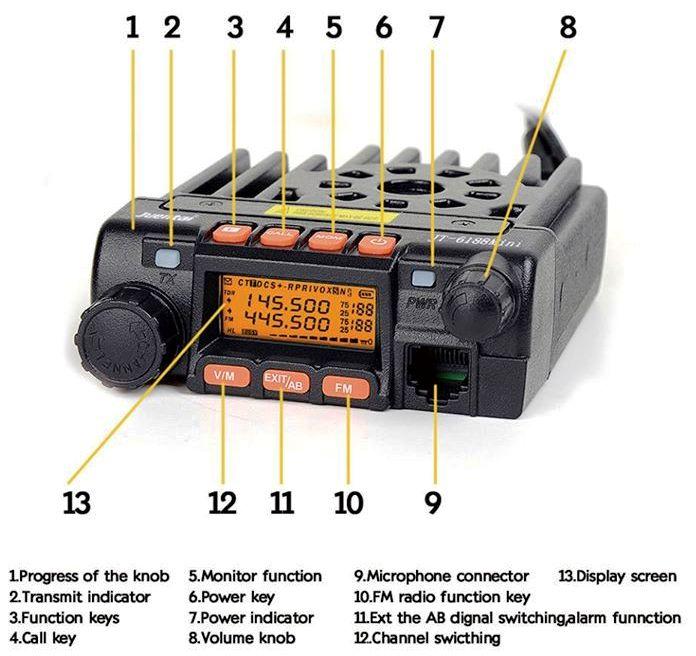
Press [V/M] to toggle between VFO and Channel Memory | |||
Press [MOM] to disable squelch, press again to enable. MOM = Monitor! | |||
Press [EXIT/AB] to toggle between top or bottom receive frequency. | |||
On the hand mic press and hold [#/lock] to lock controls, press and hold again to unlock | |||
The large left knob on these doesn't work well. Change freq or chan using hand mic UP and DOWN buttons. | |||
==programming== | |||
Important Program Menu Items: | Important Program Menu Items: | ||
| Line 67: | Line 78: | ||
44. factory reset | 44. factory reset | ||
For channel name assignments, you must program the memory for the frequency, then go back into the channel name mode, enter the name (note: mic buttons much faster than trying to spin the knob on this), and then give it the memory number to assign the name to. | For channel name assignments, you must program the memory for the frequency, then go back into the channel name mode, enter the name (note: mic buttons much faster than trying to spin the knob on this), and then give it the memory number to assign the name to. | ||
Revision as of 20:32, 2 June 2016
QYT KT-8900
also known as:
Zastone KT8900, QYT KT-8900, QYT KT8900 136-174/400-480MHz Mini Mobile Radio Transceiver, Juentai JT-6188 Mini (6188Mini)
Waccom Mini-8900, SainSonic GT-890, TC-UV8900, BTECH MINI UV-2501
Also: Zastone MP300 20W MINI Moblie radio
Value: $90 - $120 new
Function:
- Dual Band VHF:136-174MHz UHF:400-480MHz
- Step Frequency 5KHz, 6.25 KHz, 10 KHz ,12.5 KHz, 15 KHz, 25 KHz
- CTCSS / DCS / 5Tone / 2Tone / DTMF
- High/Low Transmitted Power 25W/20W(VHF/UHF)
- 200 Channel Memory
- Phase lock step
- Operating Volts: 13.8V DC±15%
- Frequency Stability: ±2.5ppm
- Operating Temperature: -20~+60
- Dimension(W x H x D): 98(W) x 35(H) x 118(D)mm
- Weight: 408g
Manufacturer propaganda: JT-6188 is the 2015 new product , the world’s smallest dual band mobile radio , Its output power is 20w at VHF , and 15w at UHF ,and have 200 channels . This radio is very easy to install on cars ,and motorcycles.
Review
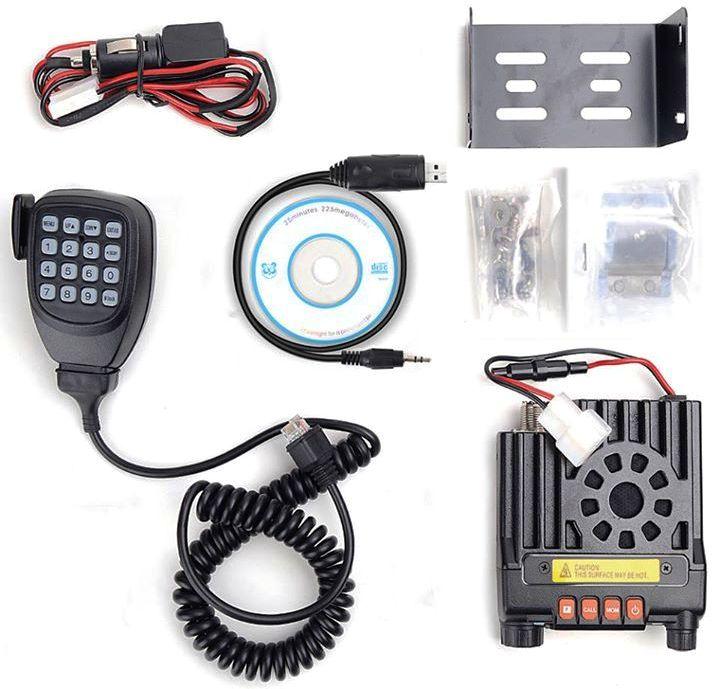
The KT8900 is rated at 20-25W. A 13.6VDC power supply used when not mobile. There is a defunct menu option for Audio Scrambler, the option does nothing. The radio comes with a full function keypad style microphone. Functions include: Menu, Up, Down, A/B, Exit, Reverse, Scan and Lock. The RJ-45 microphone jack has the same pin output as the Kenwood.
For computer program it requires Prolific Driver 3.2.0.0 or compatible, it is a prolific chip cable, not a standard USB cable.
Due to the fact that the Chinese suck at English translation, the Monitor button reads MOM, rather than MONI. Some other annoyances include a lack of an external Speaker jack. The port in rear is for a programming cable only. There is no 2.5 kHz stepping which makes entry of some UHF frequencies difficult.
Some problems with the radio: Volume is very loud. The volume control is nearly useless. You turn slightly and the sound goes from deaf to blasting with little in between. The audio potentiometer is not a correct match. Signal lock after scan sometimes produces no audio. This is a glitch. Cannot connect an external speaker. Apparently, the audio jack in the rear is just for the programming cable and cannot be used for an external speaker.
Cross-band interference is a real problem with these. They are noisy radios. Driving by power lines causes monitor to break squelch and generate noise. Transmissions on nearby frequencies also bleeds though.
Some quick positives: It is very small, it seems pretty tough, and it is inexpensive. I use them as backup radios to quickly place in a vehicle while the main radio is being serviced. For the size they push pretty good transmit power and the microphone audio is loud.
basic usage
Press [V/M] to toggle between VFO and Channel Memory
Press [MOM] to disable squelch, press again to enable. MOM = Monitor!
Press [EXIT/AB] to toggle between top or bottom receive frequency.
On the hand mic press and hold [#/lock] to lock controls, press and hold again to unlock
The large left knob on these doesn't work well. Change freq or chan using hand mic UP and DOWN buttons.
programming
Important Program Menu Items:
1. step
3. tx power
11. rx ctcss
13. tx ctcss
36. memory add
37. memory del
38. offset + - off
39. offset use 00.600 or 05.000
44. factory reset
For channel name assignments, you must program the memory for the frequency, then go back into the channel name mode, enter the name (note: mic buttons much faster than trying to spin the knob on this), and then give it the memory number to assign the name to.
Here is a more simplified guide to entering repeater frequencies with offset into a channel memory:
Program Repeater into Memory
- In VFO set the top to the repeater frequency
- In VFO set the bottom to the repeater offset
- Return to top and press [MENU] + (3) and
- set TX Power, (stay in menu...)
- then goto menu item (13) and set the CTCSS tone, (stay in menu...)
- then goto menu item (36) select your memory channel number and save [EXIT/AB]
- In VFO goto the bottom and press [MENU] + (3) and
- verify TX Power, (stay in menu...)
- then goto menu item (13) and verify the CTCSS tone, (stay in menu...)
- then goto menu item (36) and select THE SAME memory channel number and save [EXIT/AB]
While in the menu item (36) if the channel you select is empty then just the channel number will be displayed, however, if a value is already present then you will see "CH-" ahead of the number. Your initial repeater frequency should go into an empty memory channel, and when you save the offset then the same memory channel should have the "CH-" present.
It seems to be necessary to set or verify the CTCSS tone in both top and bottom VFO even though it is a TX CTCSS.
By repeating the save, the second being the offset on bottom, stored in the same channel memory, this quirky little radio will now have the repeater freq and offset freq in memory along with any PL tone.


