MythTV Setup- IP Remote Control: Difference between revisions
No edit summary |
No edit summary |
||
| Line 14: | Line 14: | ||
[[File:mythmote02b.jpg]] | [[File:mythmote02b.jpg]] | ||
The General Setup is a wizard with several screens to click though. | The General Setup is a wizard with several screens to click though. You will skip past a few screens (typically 6) without altering the settings by simply clicking the "next" button in the lower right. You will skip past the following: Database Configuration 1/2, Database Configuration 2/2, Settings Access, General, Media Monitor, and Shutdown/Reboot Settings until you come to the screen labeled "Remote Control." | ||
[[File: | [[File:mythmote04b.jpg]] | ||
Check the box labeled "Enable Network Remote Control Interface." Leave the default port set to "6546". Now click the next button in the bottom right and on the final screen click the finish button in the bottom right. | |||
Check the box labeled "Enable Network Remote Control Interface." Leave the default port set to "6546" and UDP "6948." Now click the next button in the bottom right and on the final screen click the finish button in the bottom right. | |||
Revision as of 11:56, 23 January 2015
Frontend control socket
MythTV can be controlled remotely from any IP based device, including an Android smartphone. Using a software (app) on the Android smartphone such as Mythmote turns your smartphone into a remote control for MythTV.
Your front-end system should be assigned a static IP address. Although this is not a requirement, it will prevent future connectivity issues as a result of the IP being reassigned.
Frontend Setup
Menu navigation to the correct settings screen may vary a little depending on your version and theme.
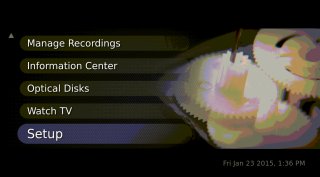
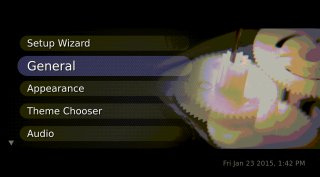
From the home screen choose "Setup" -> "General"
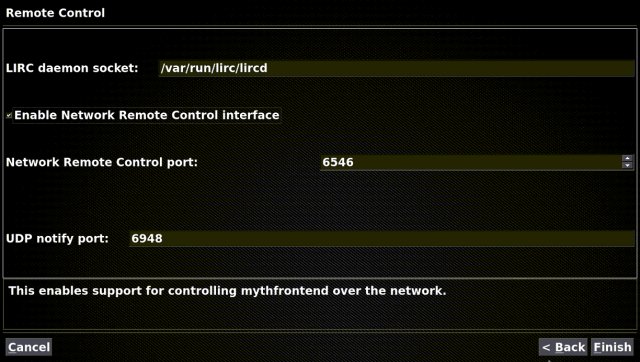
The General Setup is a wizard with several screens to click though. You will skip past a few screens (typically 6) without altering the settings by simply clicking the "next" button in the lower right. You will skip past the following: Database Configuration 1/2, Database Configuration 2/2, Settings Access, General, Media Monitor, and Shutdown/Reboot Settings until you come to the screen labeled "Remote Control."
Check the box labeled "Enable Network Remote Control Interface." Leave the default port set to "6546" and UDP "6948." Now click the next button in the bottom right and on the final screen click the finish button in the bottom right.


