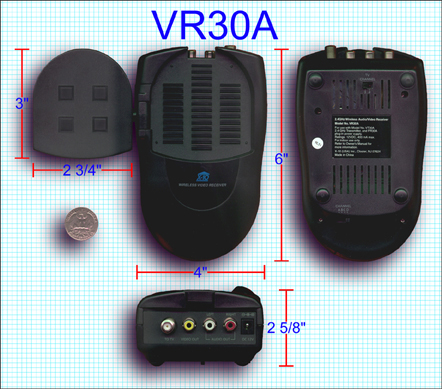
Entertainment Receiver (Model VR30A)
This receiver was designed so you could transmit video and stereo sound from a DVD or MP3 player (whether external or PC-based), or even a Broadband Video Download via the Net, to any TV or stereo system in your home. Works great with Entertainment Anywhere, or DVD Anywhere. If you're looking to expand your system so you can transmit your Movies to multiple TV's at the same time, then this is the proper Video Receiver. Note: Not for use with cameras. If you try to use this receiver with a camera there will be sound problems.
Introduction For our installation example, we will be using the following components:
   * Video Transmitter (VT30A)
   * Video Receiver (VR30A)
   * Power Supply, Video Transmitter (PT30A)
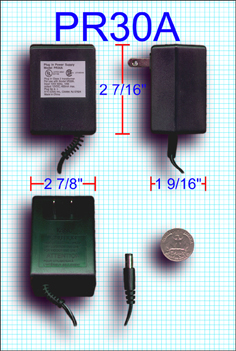
   * Power Supply, Video Receiver (PR30A)
   * 3-jack, RCA patch cable
   * Coaxial cable
Setup In this example, we will send the output from a VCR to a nearby television. The VCR used has auxiliary audio and video output jacks. We will use coax cable to connect to the cable/antenna jack on the back of the television.
Configuring the Video Transmitter
  1. On the bottom of the VT30A Video Transmitter locate the Channel switch. Move the switch to position "A".
  2. Using the 3-jack, RCA patch cable, connect one end to the video and audio output jacks on the VCR. Match the cable colors to the colors on the jacks.
  3. Connect the other end of the patch cable to the video and audio input jacks on the back of the Transmitter.
  4. Lift the antenna dish on the Transmitter and orient it in the general direction of where the Video Receiver will be located.
  5. Plug the PT30A Power Supply's power cord into the Transmitter's power jack. Note: Make sure you use the correct power supply, the PT30A is the smaller of the two power supplies.
  6. Plug the power supply into a nearby outlet.
Configuring the Video Receiver
  1. On the bottom of the VR30A Video Receiver locate the Channel switch. Move the switch to position "A".
  2. Also located on the bottom of the Receiver, find the TV Channel switch and set it to the television channel you wish to display the output (either 3 or 4).
  3. Using the coaxial cable, connect one end to the Receiver's coax jack and the other end to the television's cable/antenna coax jack.
  4. Lift the antenna dish on the Receiver and orient it in the general direction of the Video Transmitter.
  5. Plug the PR30A Power Supply's power cord into the Receiver's power jack. Note: Make sure you use the correct power supply, the PR30A is the larger of the two power supplies in the kit.
  6. Plug the power supply into a nearby outlet.
Testing The System
  1. Locate the power switch on the side of the Video Receiver. Move it to the On position. A small red light should appear on the front of the Receiver.
  2. Locate the power switch on the side of the Video Transmitter. Move it to the On position. A small red light should appear on the front of the Transmitter.
  3. Turn on the television and change the channel to match the channel you chose for the Receiver's TV Channel switch (3 or 4).
  4. Turn on the VCR, insert a video tape containing a movie or a previously recorded television show.
  5. Play the tape. The video playback should appear on the television.
  6. If the video or audio is distorted, try reorienting the antennas on the Transmitter and Receiver. Try to avoid sending the RF signal through metal objects or near high power electronics as they may distort the signal. If the video or audio continues to be distorted, try setting the Transmitter and Receiver to the other transmission channels (B, C, and D) to rule out interference from another device operating near the 2.4GHz range.
For some VCRs, sending the output through the auxiliary output(s) may require a mode change. If you do not see the playback on the television, check the VCR's manual for instructions about routing the playback through the auxiliary output rather than the TV/Antenna output (coaxial cable).

